
CNC Gantry Milling Machine Bed Leveling and Precision Calibration is the most overlooked foundational step in heavy machining, and it’s the first thing that separates a reliable shop from one that chases constant tolerance errors.
I’ve spent 13 years on the shop floor working with CNC gantry mills of all sizes, from small 2m models to large 8m industrial machines, and I can say this without hesitation: 70% of recurring precision issues, uneven part wear, chatter, and inconsistent machining results trace straight back to a poorly leveled machine bed.
A lot of shops skip full bed leveling after machine installation, or only do a quick check once a year. They think “it’s sitting flat on the floor, so it’s fine” — but that’s a costly mistake. Factory floors settle over time, machine vibration shifts leveling pads, and even minor temperature changes can throw off the bed’s flatness. For large-format work like 1.5m×1m steel plates (the same parts we tested with our Beijing client last week), a misleveled bed ruins flatness results before you even clamp a piece down.
This guide breaks down the full, shop-proven CNC Gantry Milling Machine Bed Leveling and Precision Calibration process in simple, actionable steps — no fancy engineering jargon, just the tools and moves we use every day to keep gantry mills running within tight tolerances. Let’s dive in.
Why for CNC Gantry Milling Machine Bed Leveling and Precision Calibration Is Non-Negotiable For Every Shop
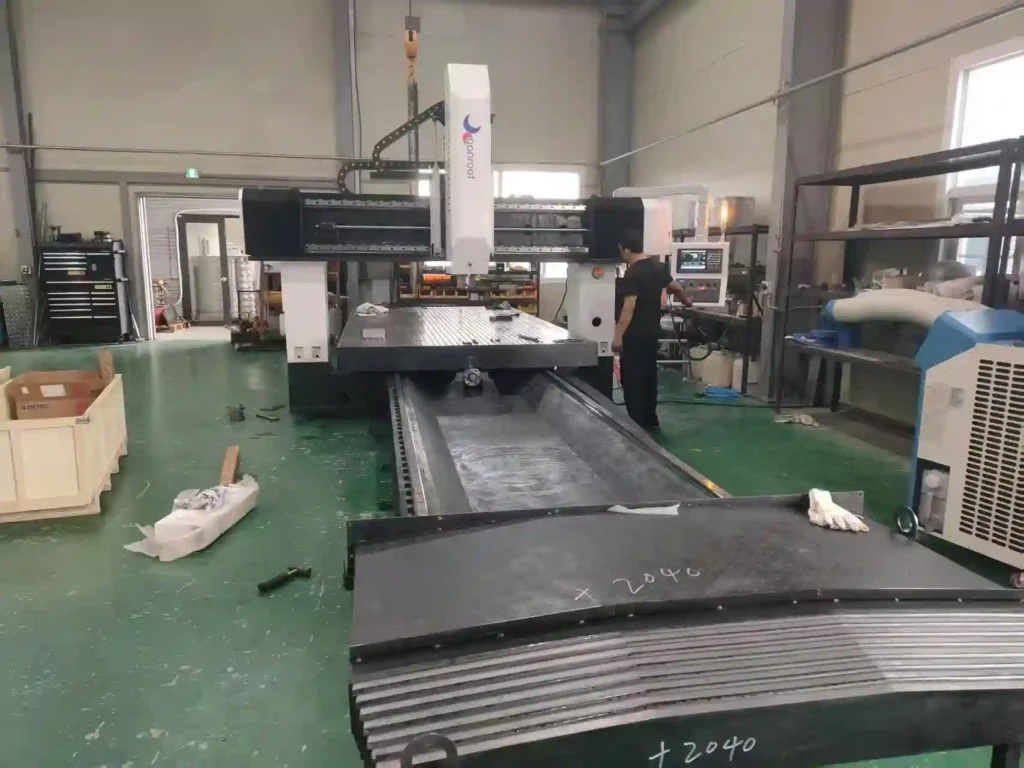
The machine bed is the base of every CNC gantry milling machine. It holds the worktable, supports heavy workpieces, and keeps the entire gantry frame aligned during high-speed cutting.
If the bed is even slightly out of level, every axis movement is off. You’ll see uneven edge cuts, inconsistent hole chamfers, height differences across large plates, and accelerated wear on linear guides, ball screws, and spindle bearings. Over time, this leads to costly part scrap, unplanned downtime, and shortened machine life.
We had a local client last year who struggled with 1-2mm height differences on large steel plates, just like our recent Beijing trial. They replaced guides and adjusted spindles twice, wasting thousands — until we checked their machine bed. It was 1.2mm out of level across the X-axis. A full leveling and calibration fixed the issue in half a day, and their part tolerance dropped to under 0.3mm immediately.
This isn’t just a one-time setup task. CNC Gantry Milling Machine Bed Leveling and Precision Calibration should be done during initial installation, after any machine relocation, after major maintenance, and quarterly for high-production shops. It’s a small investment of time that saves massive headaches down the line.
Essential Tools for CNC Gantry Milling Machine Bed Leveling and Precision Calibration
You don’t need expensive lab equipment to level a gantry mill bed — just the basic tools every machine shop should have on hand. This is hands-on work, not rocket science.
| Tool Name | Purpose | Tolerance Standard |
| Digital Precision Level (0.02mm/m accuracy) | Measure bed flatness and level across X/Y axes | ≤0.02mm/m for heavy machining |
| Dial Indicator + Magnetic Base | Check table runout and axis parallelism | ≤0.01mm total runout |
| Adjustable Leveling Pads/Wedges | Fine-tune bed height and eliminate sag | Machine-specific factory specs |
| Clean Lint-Free Cloths | Wipe bed surface clean before testing | N/A |
| Torque Wrench | Tighten foundation bolts evenly | Factory-specified torque value |
Before you start, make sure the machine is turned off and cooled down completely — at least 2 hours after last use. Heat from machining can expand the bed frame and give false readings. Also, clear the entire bed and worktable of chips, coolant, and clutter; a dirty surface will ruin your level measurements.
5-Step CNC Gantry Milling Machine Bed Leveling and Precision Calibration Process
Step 1: Pre-Level Inspection & Foundation Check for CNC Gantry Milling Machine Bed Leveling and Precision Calibration
Start by inspecting the machine’s foundation and leveling pads. Look for loose bolts, cracked pads, or uneven floor contact. If the floor is uneven or damaged, address that first — a solid foundation is the only way to hold a level bed long-term.
Wipe the entire bed surface with a lint-free cloth to remove all chips and coolant. Even a small metal chip under the digital level can throw off your reading by 0.1mm or more.
Loosen all foundation bolts slightly, just enough to allow adjustment with the leveling pads. Don’t remove them completely; keep them snug to prevent frame shift.
Step 2: Rough Leveling (X & Y Axes) for CNC Gantry Milling Machine Bed Leveling and Precision Calibration
Place the digital level at the center of the machine bed, first along the X-axis (longitudinal), then the Y-axis (transverse).
Adjust the leveling pads one at a time to bring the level close to zero. Focus on getting the rough level within 0.1mm/m first — don’t chase perfect accuracy here. Work slowly and adjust pads evenly, avoiding sudden changes that can warp the bed frame.
For large gantry mills, check the front, middle, and back of the bed to spot sag. Most heavy beds sag slightly in the middle, so you’ll need to fine-tune the center pads to eliminate that gap.
Step 3: Precision Leveling (Final Bed Flatness) for CNC Gantry Milling Machine Bed Leveling and Precision Calibration
This is the most critical step for tight-tolerance work. Move the digital level to 5 key points on the bed: front left, front right, middle, back left, back right.
Take a reading at each point and adjust the corresponding leveling pad to hit ≤0.02mm/m across the entire bed. Take your time here — rush this step, and you’ll be redoing it in a month.
Once all points are within tolerance, tighten all foundation bolts with a torque wrench to the factory’s specified torque. Tighten in a cross pattern to keep the bed level; don’t tighten one side fully before the other.
Step 4: Precision Calibration & Parallelism Check for CNC Gantry Milling Machine Bed Leveling and Precision Calibration
After leveling, run a full calibration to confirm the worktable is parallel to the X and Y axes, and the Z-axis is perpendicular to the bed.
Mount the dial indicator on the spindle, touch the indicator to the worktable, and run the table along the full X and Y travel. Record the total runout — it should stay under 0.01mm for standard heavy machining.
If you’re working with ultra-precise parts (like the 4.5mm steel plates from our customer trial), calibrate to ≤0.005mm runout for perfect flatness results. For official industrial calibration standards, refer to ISO 10110 Geometric Tolerance Standards to align with global machining requirements.
Step 5: Post-Calibration Test Cut & Verification for CNC Gantry Milling Machine Bed Leveling and Precision Calibration
The only way to confirm your leveling and calibration works is to run a real test cut. Use a scrap steel or aluminum plate (matching your regular production parts) and run a simple edge milling or surface cutting program.
Measure the finished part with a dial indicator or height gauge to check for unevenness. If the part is consistent across the entire surface, your calibration is done. If not, recheck the bed level in the problem area and make minor pad adjustments.
For ongoing maintenance, pair this calibration with your regular machine care — check our full guide to CNC Gantry Mill Maintenance & Care for daily, weekly, and monthly upkeep routines that preserve bed level.
Common Mistakes to Avoid During CNC Gantry Milling Machine Bed Leveling and Precision Calibration
Even experienced machinists make these mistakes — don’t let them happen to you:
- Skipping cool-down time: Hot machine frames expand, giving false level readings.
- Ignoring bed sag: Large gantry beds sag in the middle; always check multiple points, not just the center.
- Over-tightening bolts: Uneven bolt torque warps the bed frame and ruins your hard work.
- Calibrating on a dirty bed: Chips and debris create uneven surfaces and bad data.
Real Shop Case: for CNC Gantry Milling Machine Bed Leveling and Precision Calibration, Costly Plate Machining Errors
Last quarter, a repeat customer called us in a panic — they were scrapping 30% of their large steel plates due to height differences and uneven edges, exactly like the issues we faced with the Beijing client’s initial magnetic clamping test.
They had recently moved their CNC gantry mill to a new section of the shop and only did a quick level check. We ran our full 5-step bed leveling and calibration, and found the bed was 1.3mm out of level across the Y-axis.
After fixing the level and calibrating the axes, their scrap rate dropped to under 1%, and they hit consistent 0.3mm height differences on large plates — no more wasted material or missed deadlines. This is the power of proper CNC Gantry Milling Machine Bed Leveling and Precision Calibration.
Final Tips for Long-Term Precision
Don’t treat for CNC Gantry Milling Machine Bed Leveling and Precision Calibration as a one-time task. For high-production shops, check the level quarterly; for lower-volume shops, do a full check every 6 months.
Keep a calibration log next to the machine to record readings and adjustments — this helps track long-term frame stability and catches small shifts before they become big problems.
Remember: a perfectly level machine bed isn’t just about meeting tolerances — it’s about making your machine last longer, cutting down on scrap, and keeping your clients happy with consistent, high-quality parts.